We encounter that many websites face issues the first time when the free SSL is not properly installed or SSL is misconfigured so in this tutorial, we will show you how to configure the SSL properly.
1. Login into the cPanel account after that find and click on its SSL/TLS option
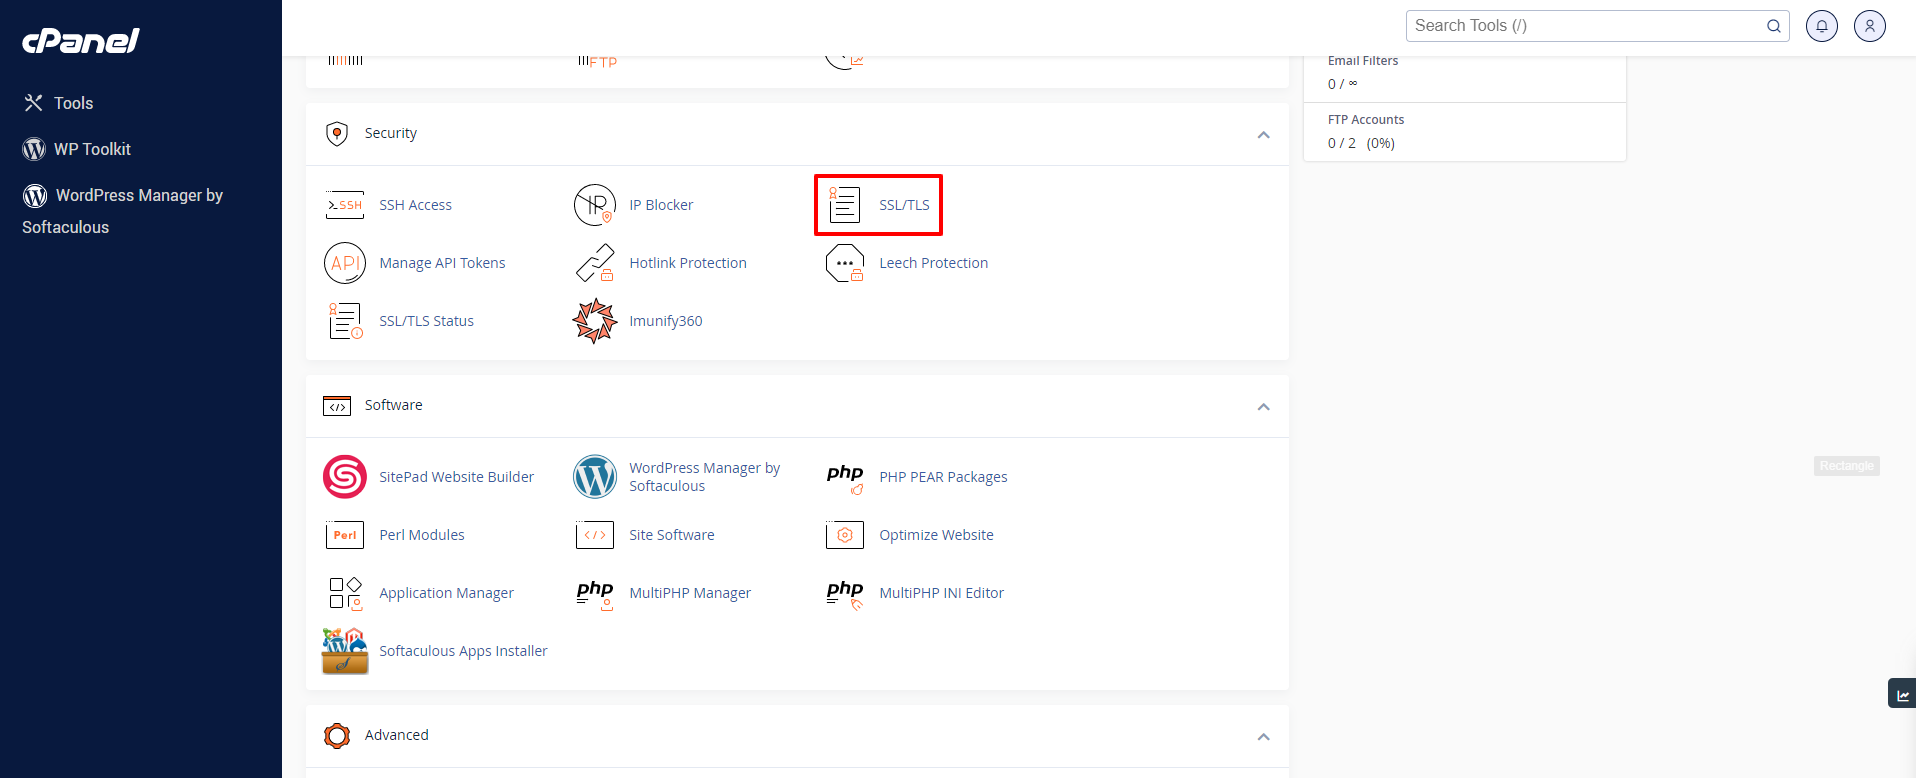
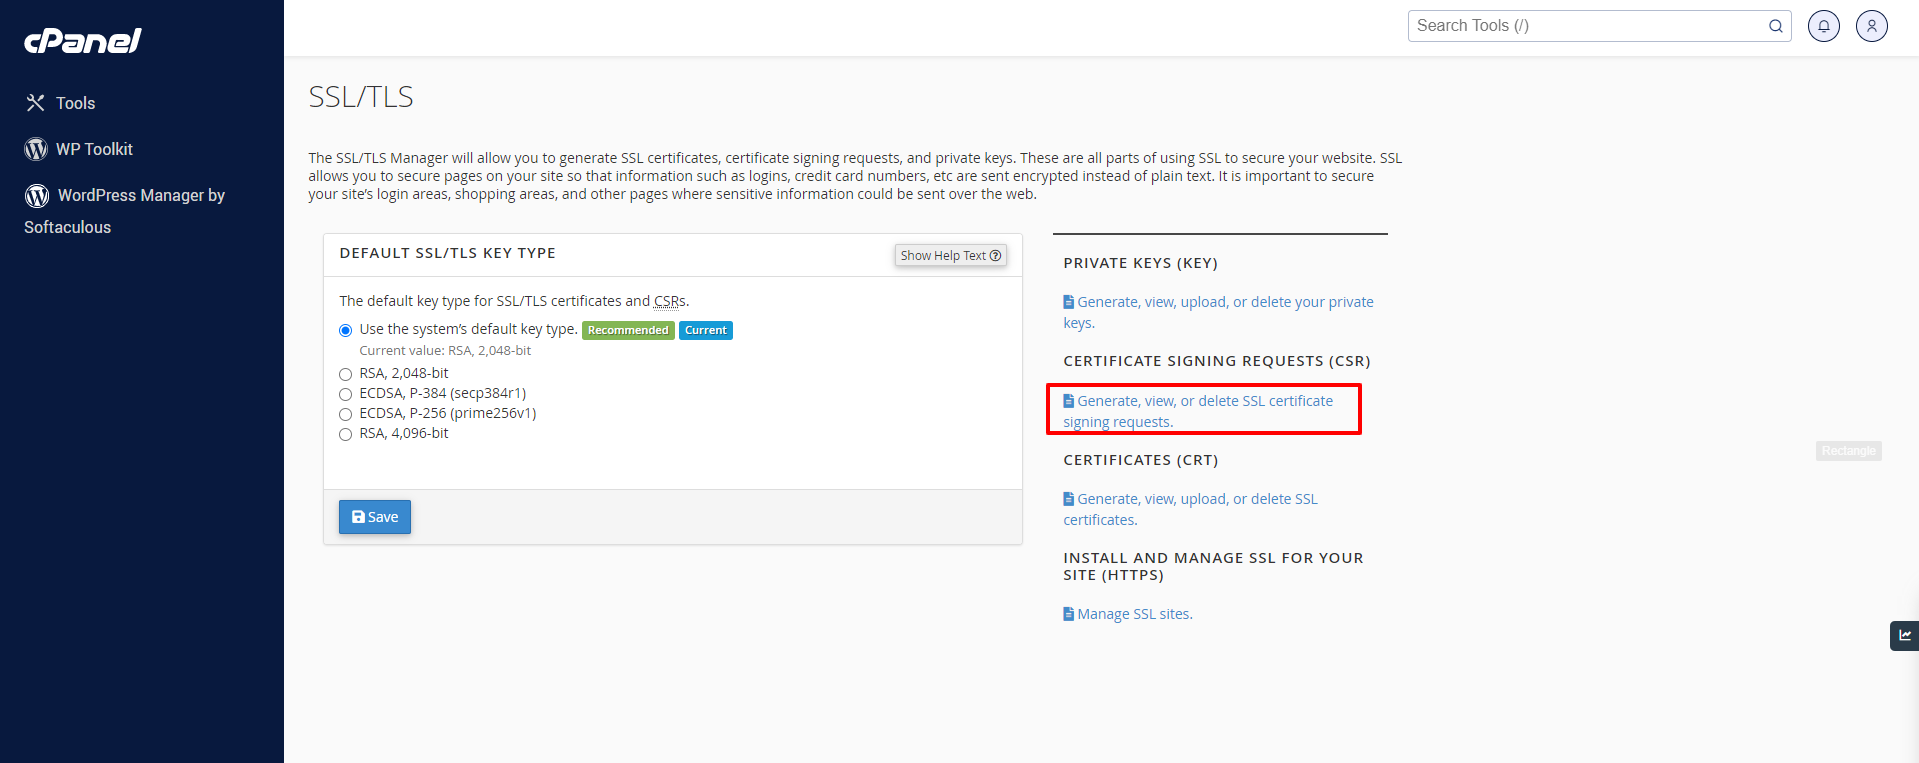
2. Under the SSL/TLS section you will see an option called “Generate, view, or delete SSL certificate signing requests” – click on this.
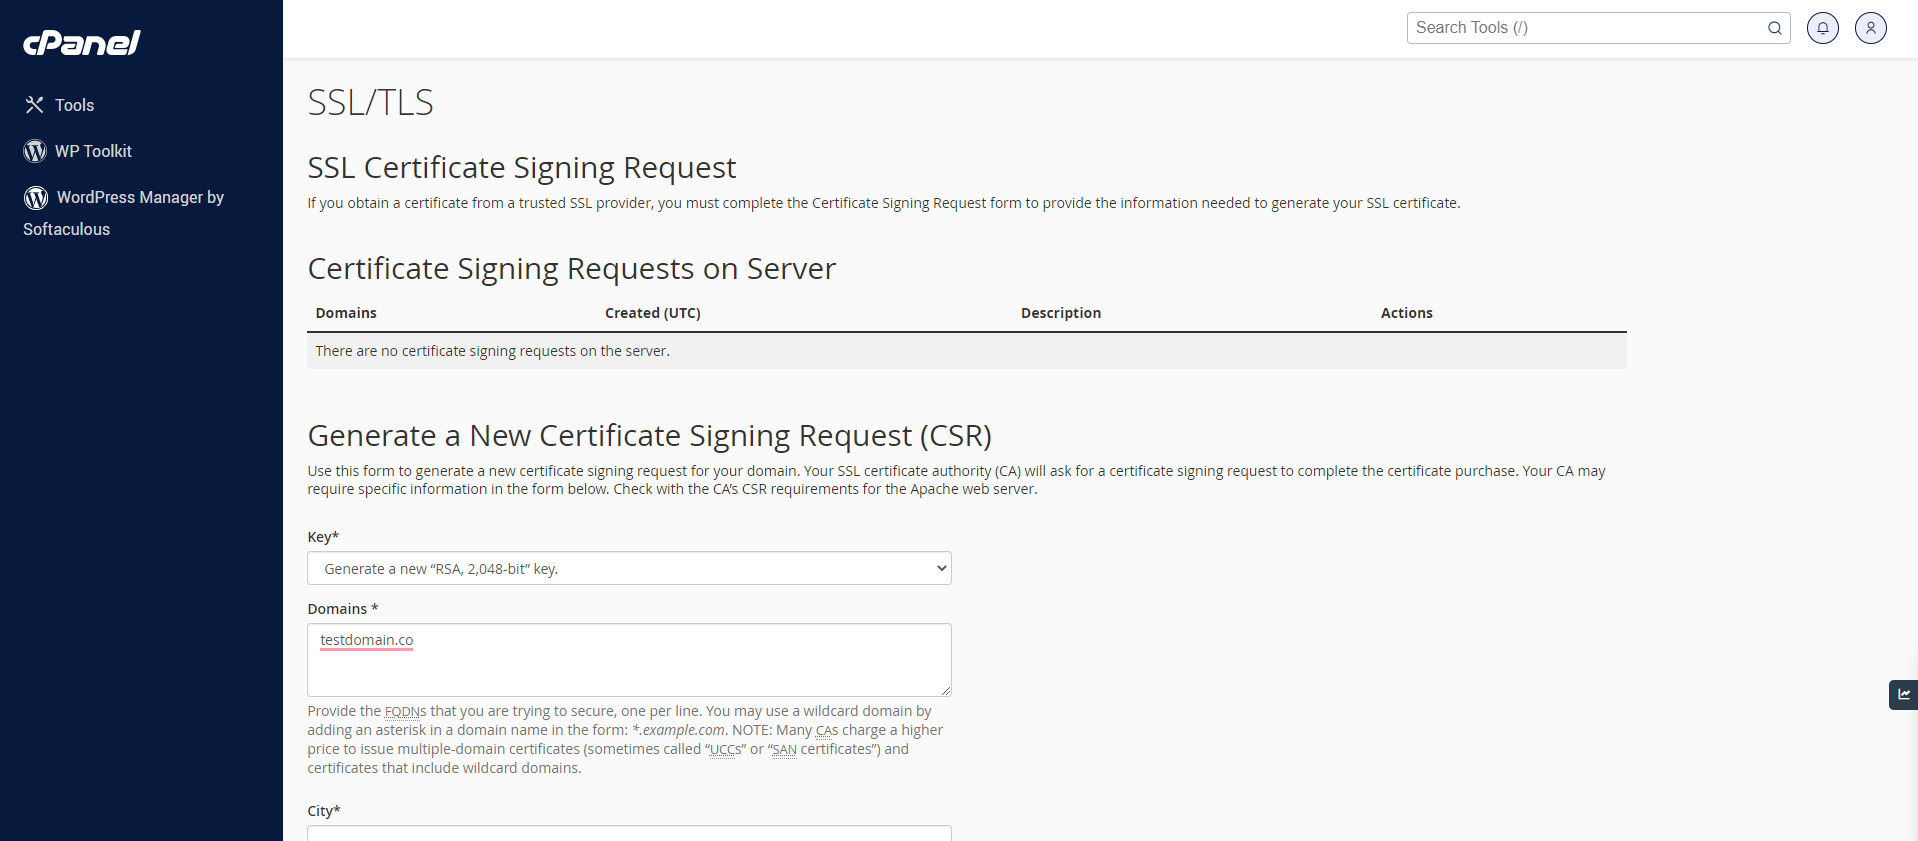
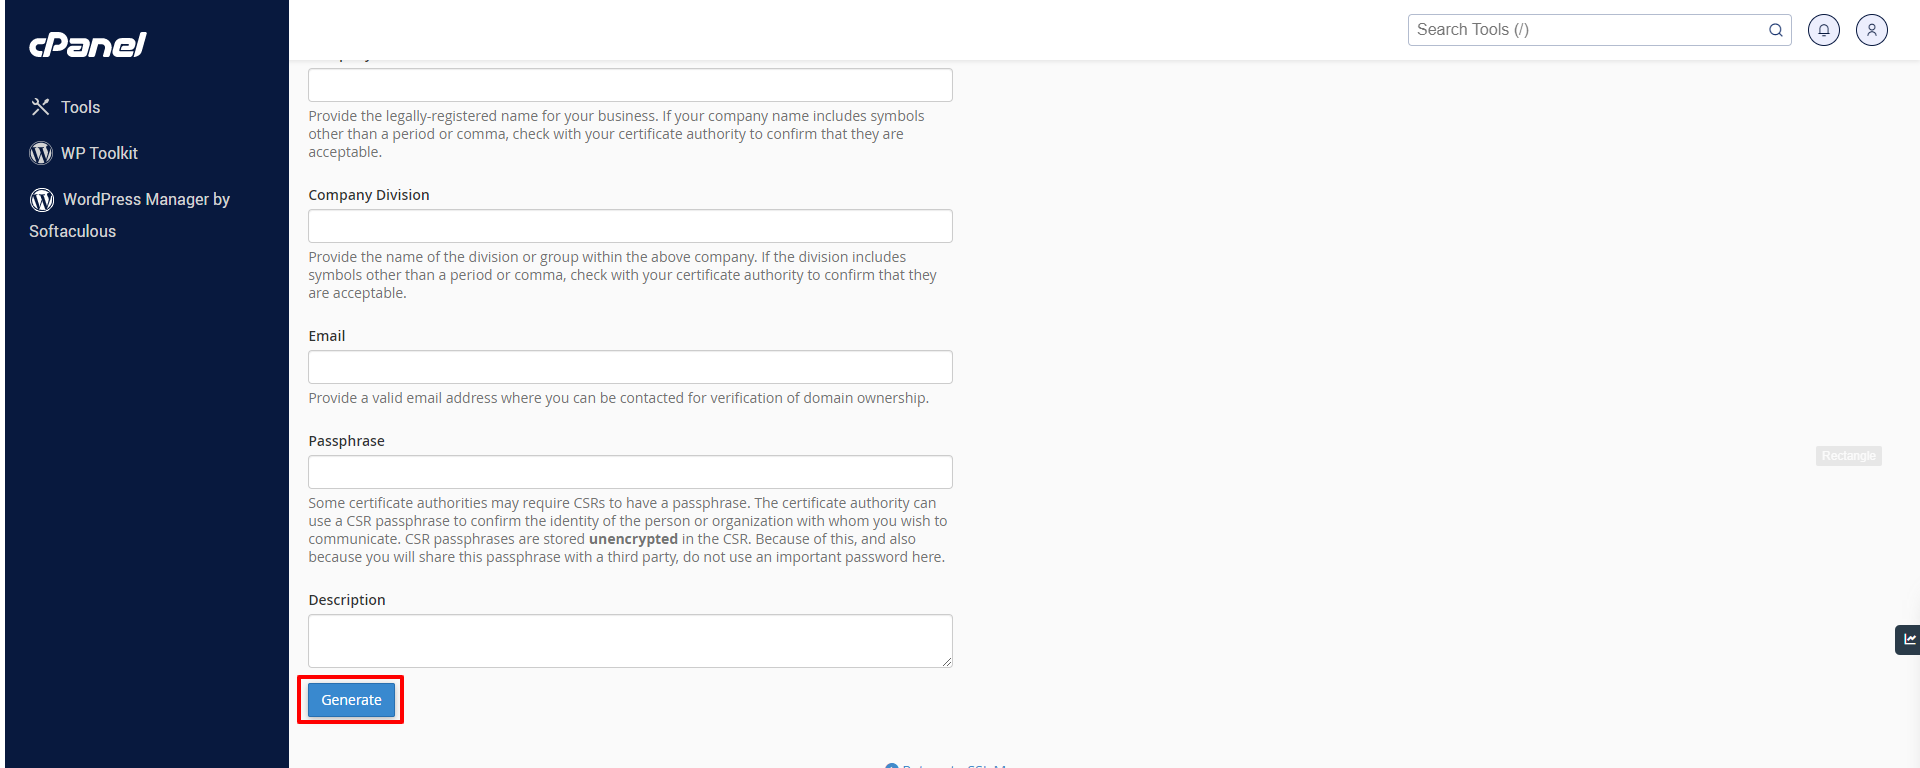
3. After click on “Generate, view, or delete SSL certificate signing requests” you will see a form fill your all details on the form after that click on the Generate button.
4. After clicking on the generate button you will see a message that the certificate is successfully generated find the screenshot below.
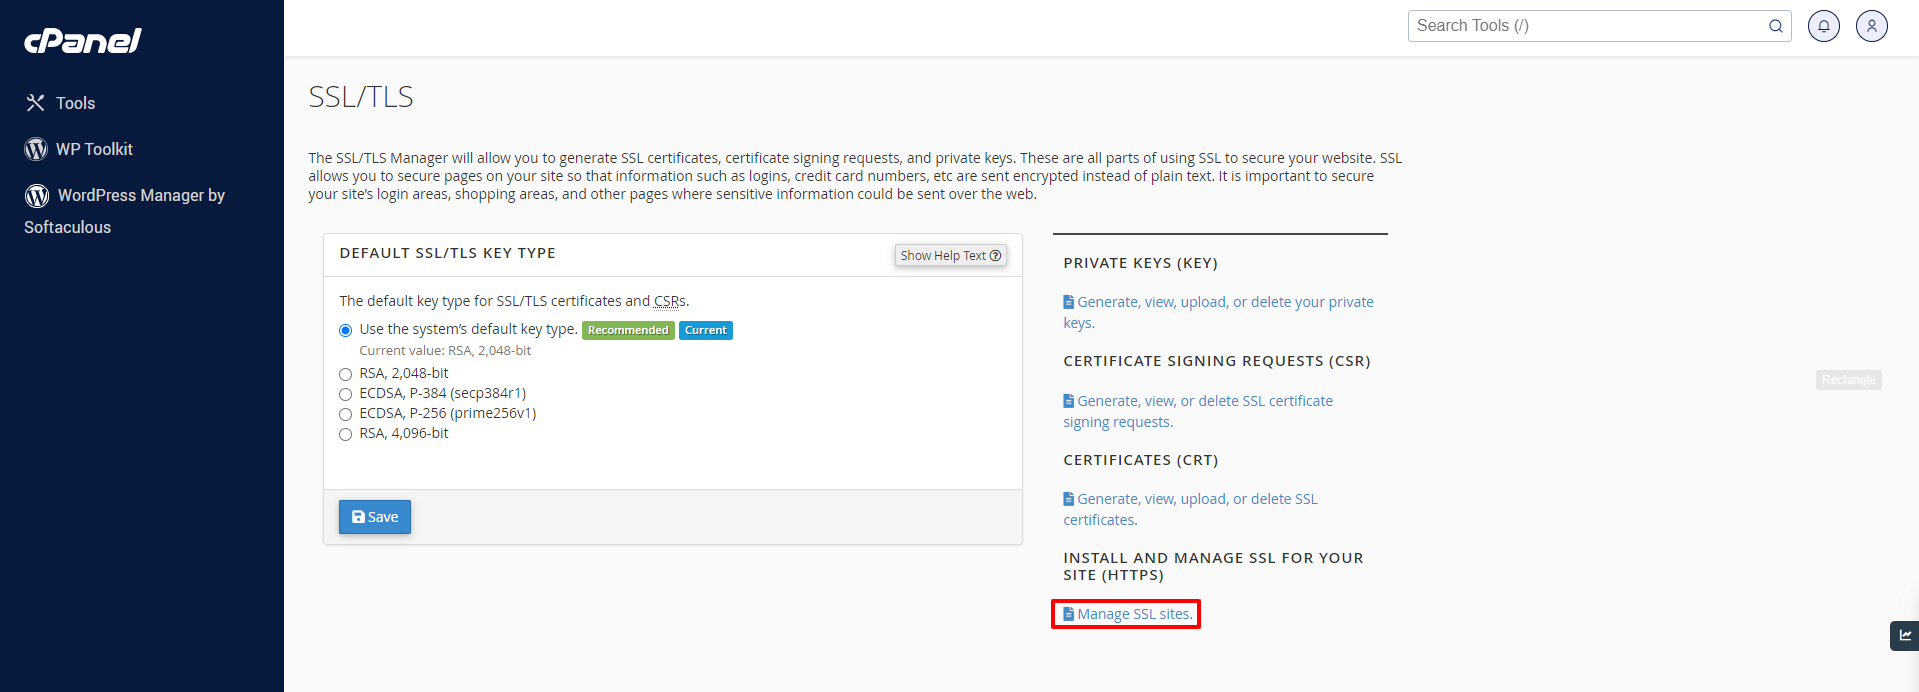
5. After that Return to the SSL manager and click “Manage SSL sites”
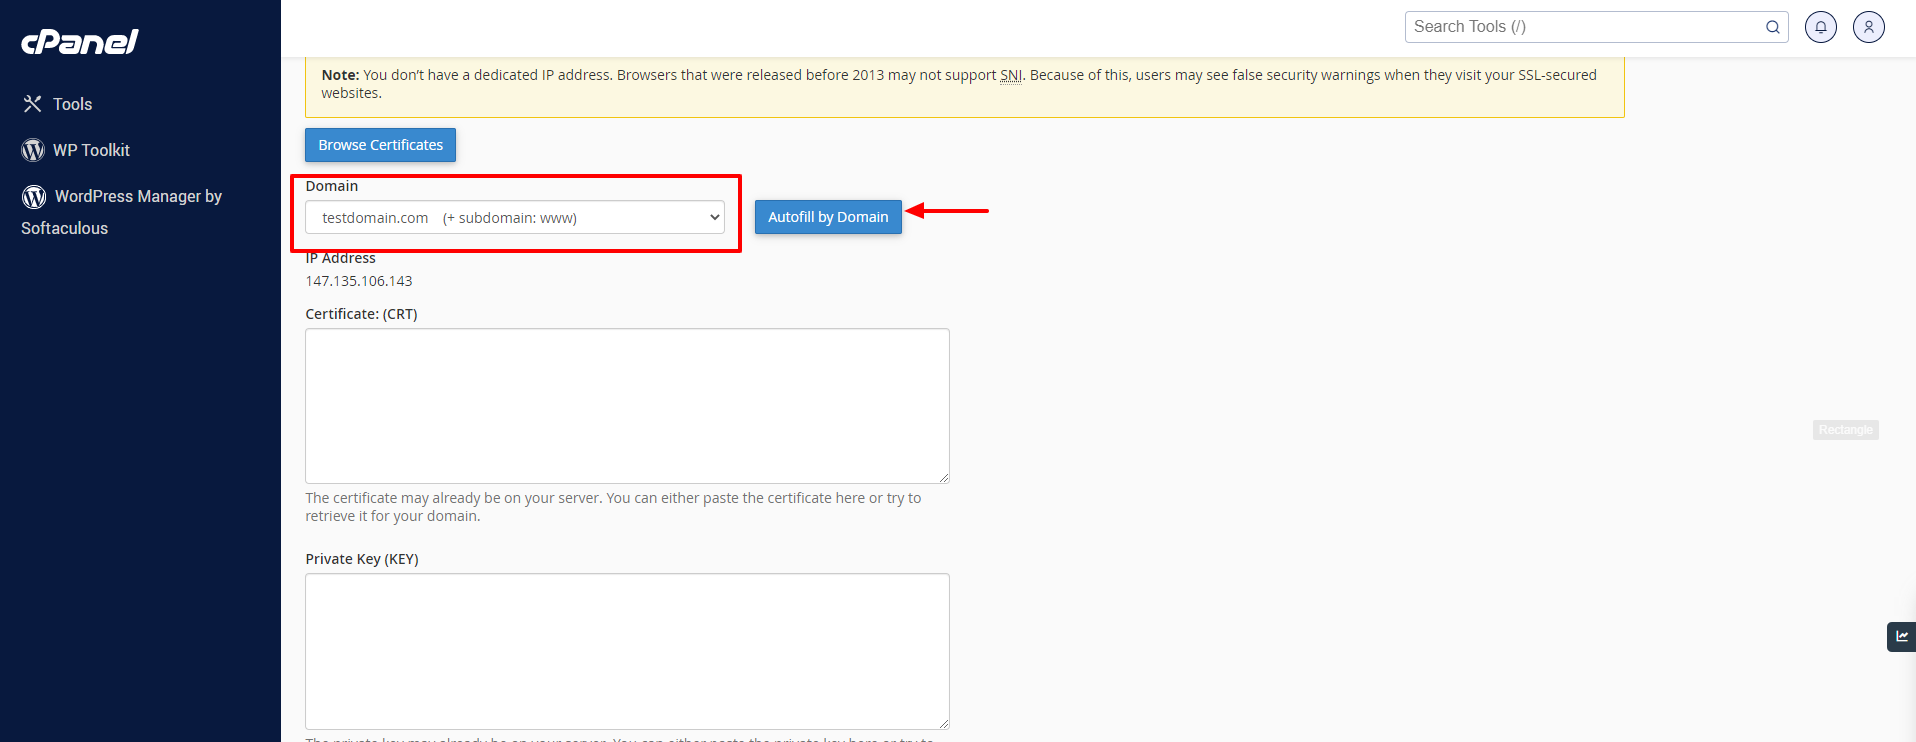
6. After goto the manage SSL site setting select the domain from the drop down and click autofill by domain button
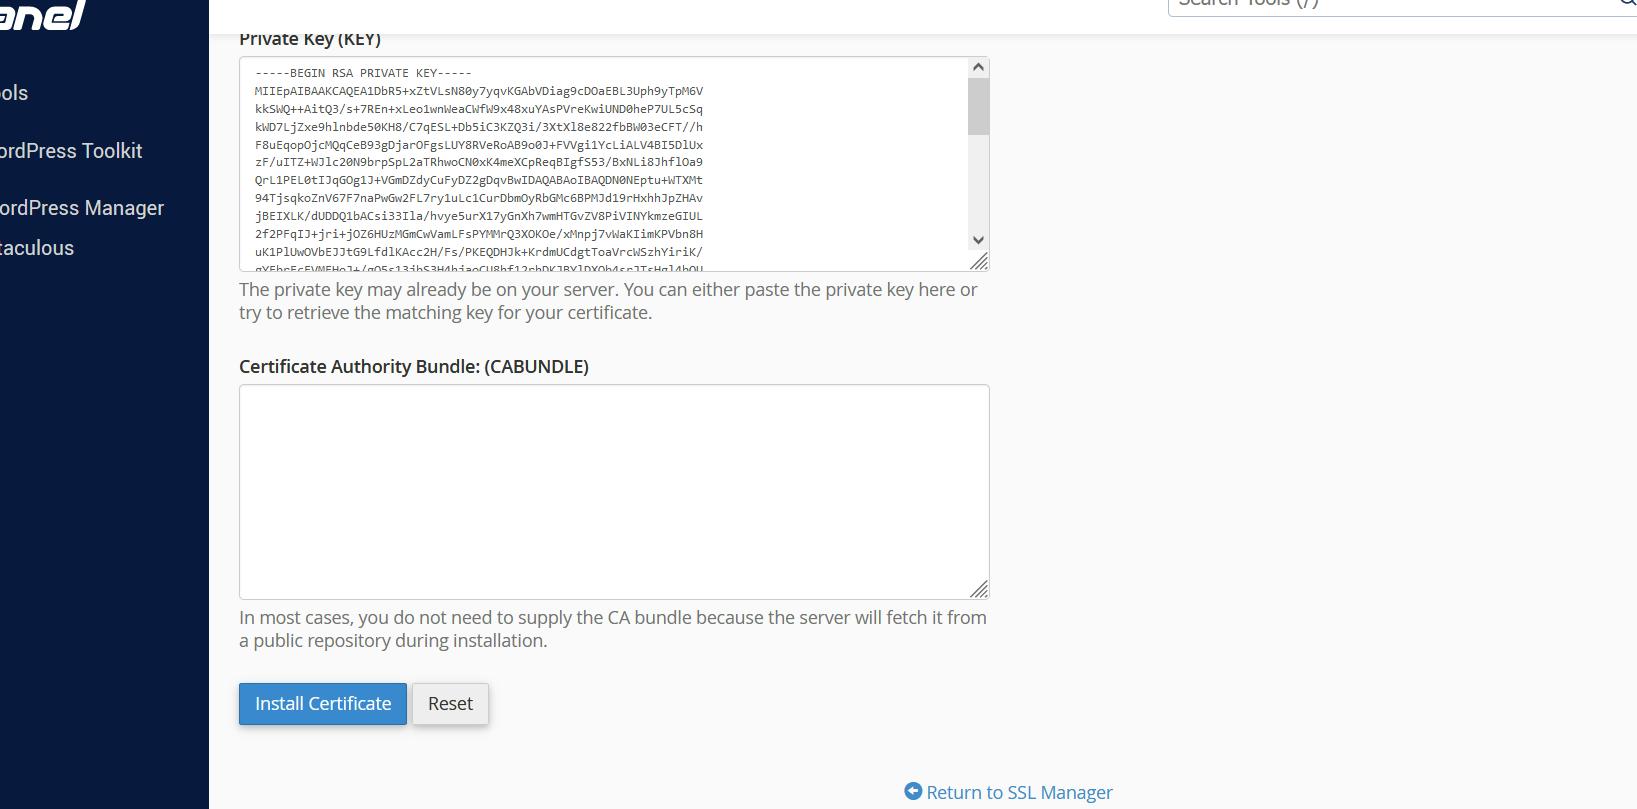
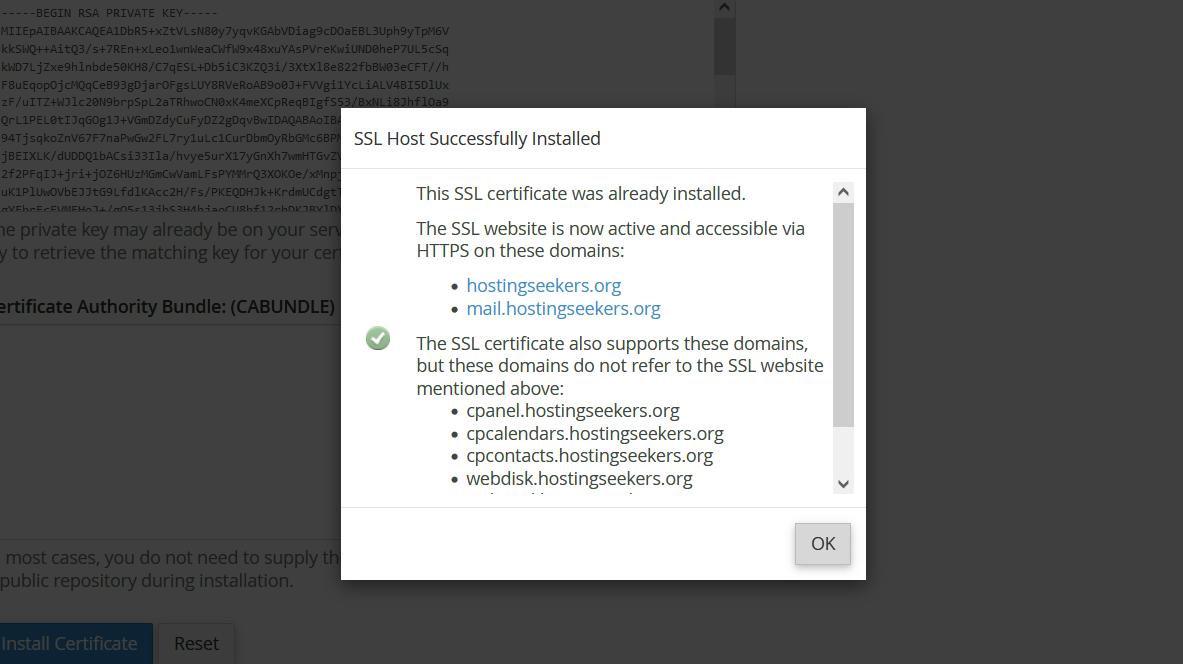
7. After that scroll down the page and click install certificate.
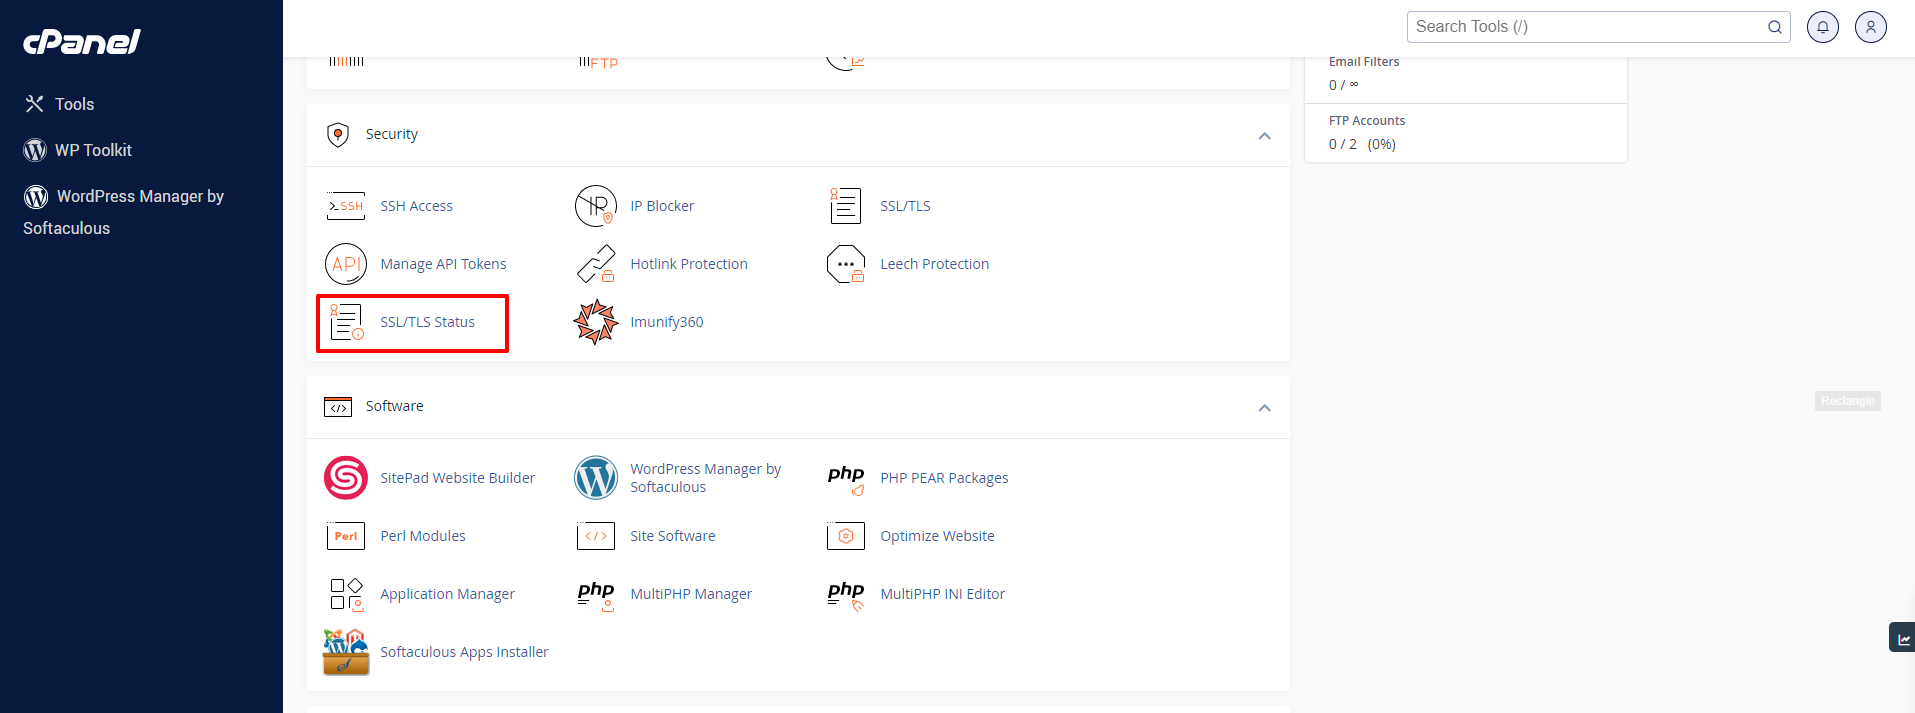
8. After completing the process goto the cPanel account and find the option called “SSL/TLS Status and click on it.
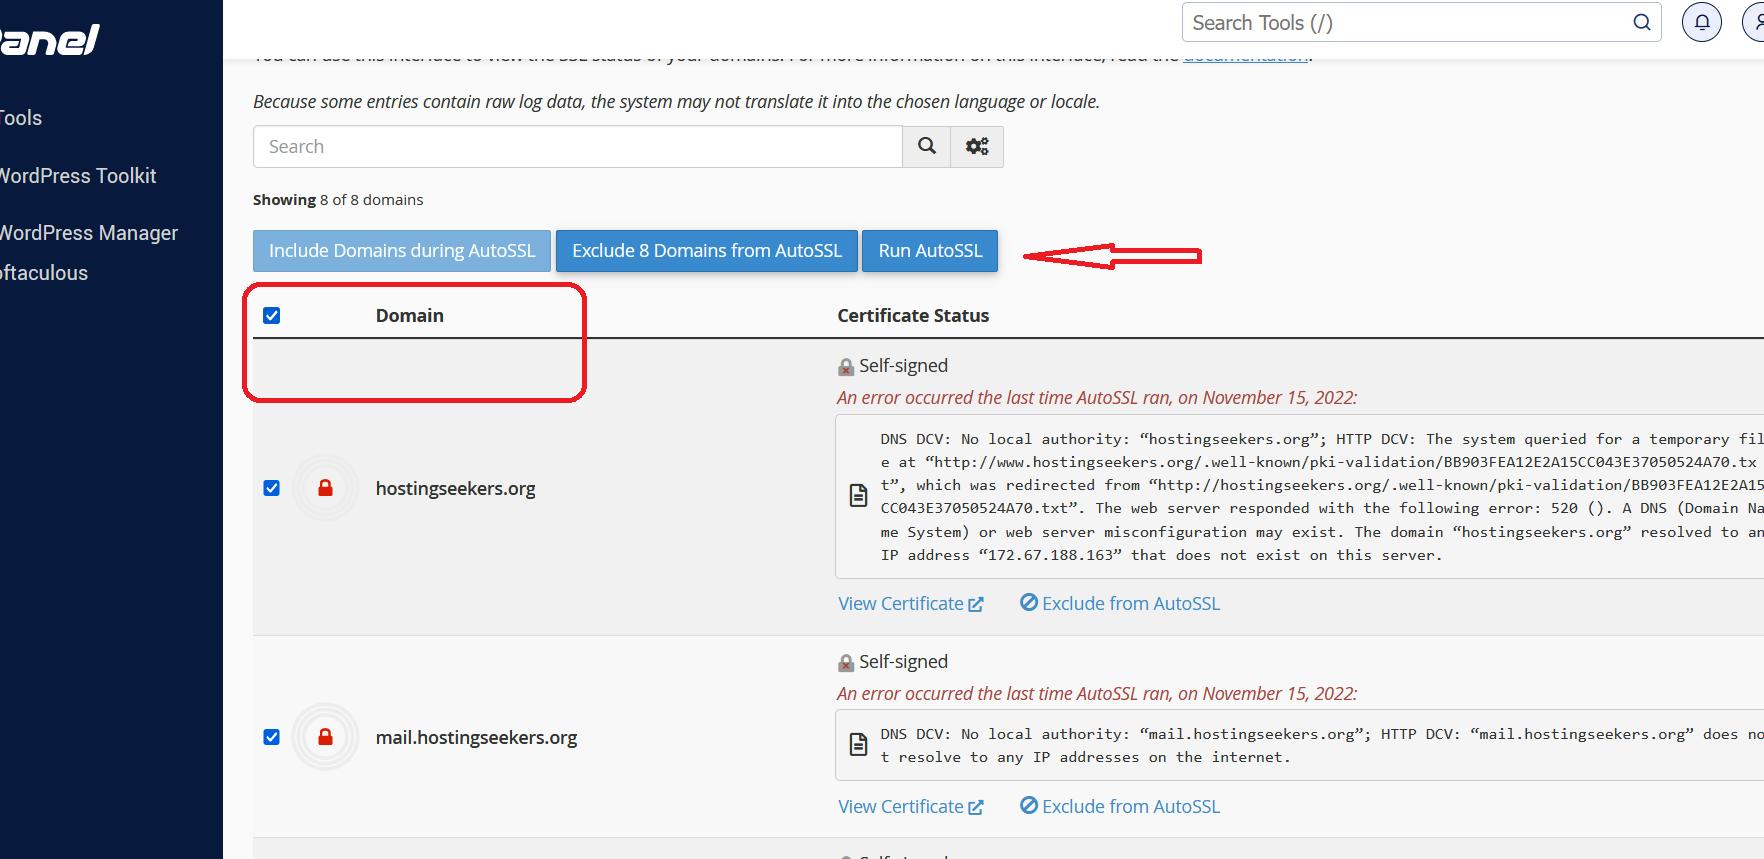
9. Now the last part you have to select all domain and click “Run AutoSSL”
Also Read: How to Change PHP-Versions in HostingSeekers Hosting